Concealed v. Through-Fastened Metal Roof and Wall Panels: How to Choose

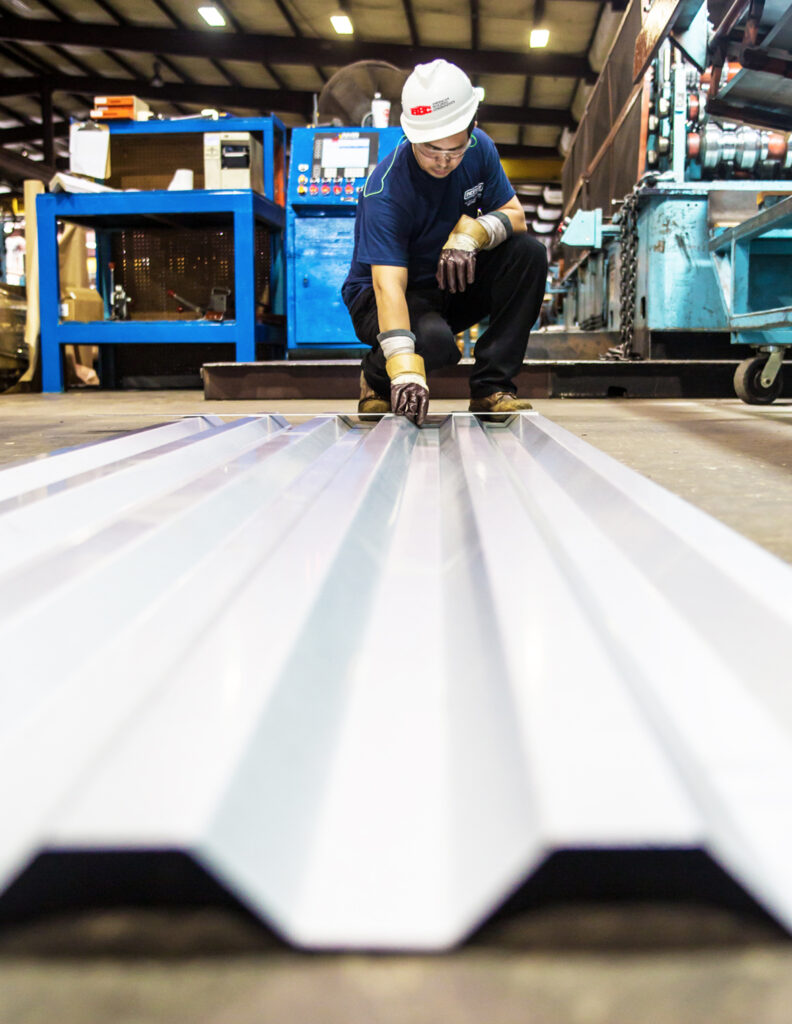
All metal panels—whether for commercial, residential, industrial or agricultural applications—are attached to the structure using either fasteners, clips or a combination of both that keep them in place. Vertical panels, in particular, are often categorized by the type of fastening method used to attach them, which is most often either using hidden/concealed fasteners or using an exposed (through-fastened) method. Here we’ll look at the benefits your customers can experience when using these common fastening types, as well as their differentiators, including price/budget, durability, aesthetics and ease of installation.

Concealed-Fastened Roofing Panels

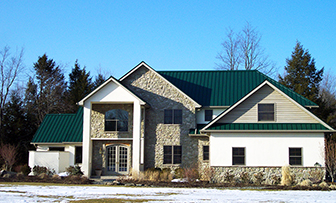
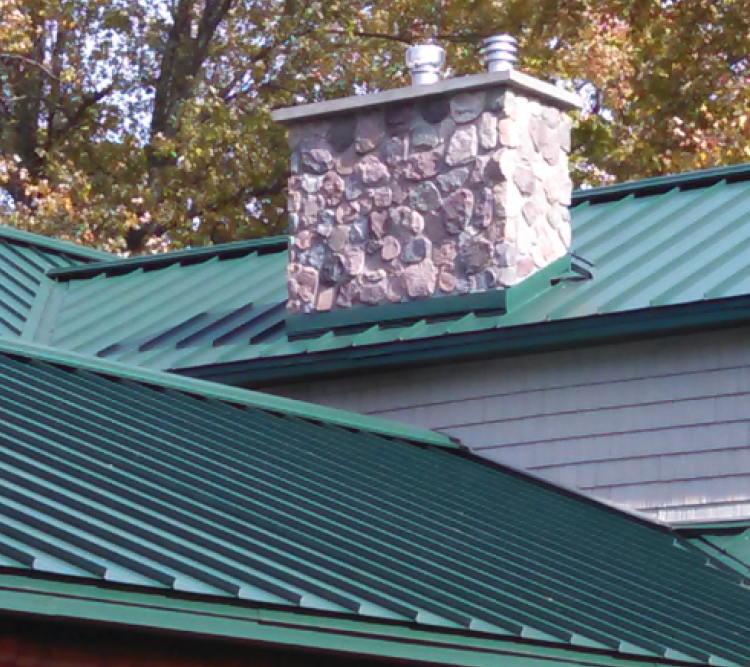
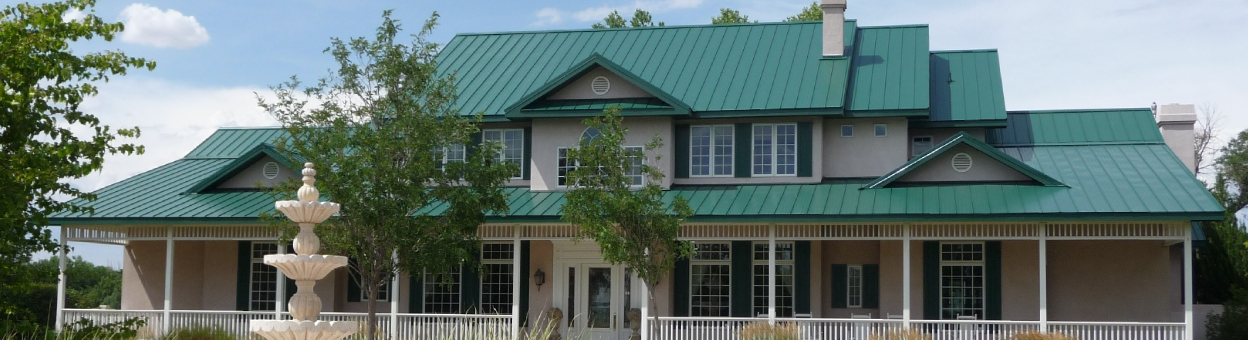
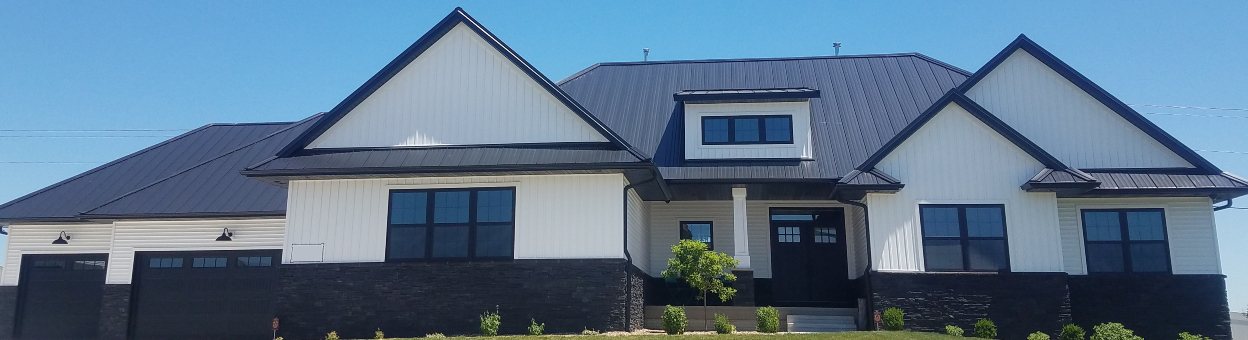
Concealed-fastened panels are attached to the substrate with clips, which means the panels are not pierced to secure the connection. The clips and fasteners, therefore, are concealed underneath the metal panels when properly installed—arguably making the roof more aesthetically pleasing. These panels are offered in various styles, depending on which options your customers choose and additional job-specific considerations. This method is common in architectural and residential applications where a clean appearance and protection from environmental exposure are priorities.

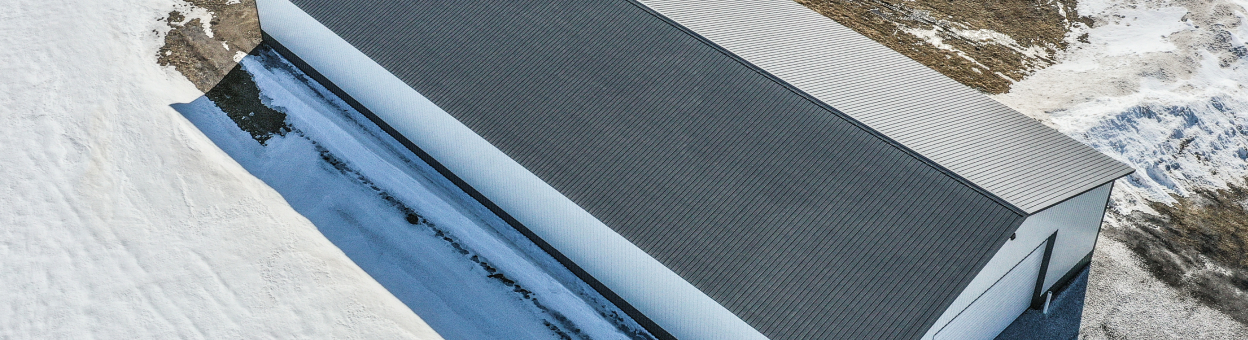
Through-Fastened (Exposed) Roofing Panels

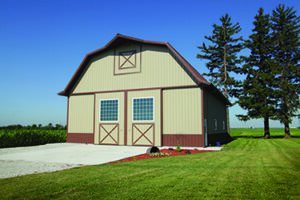
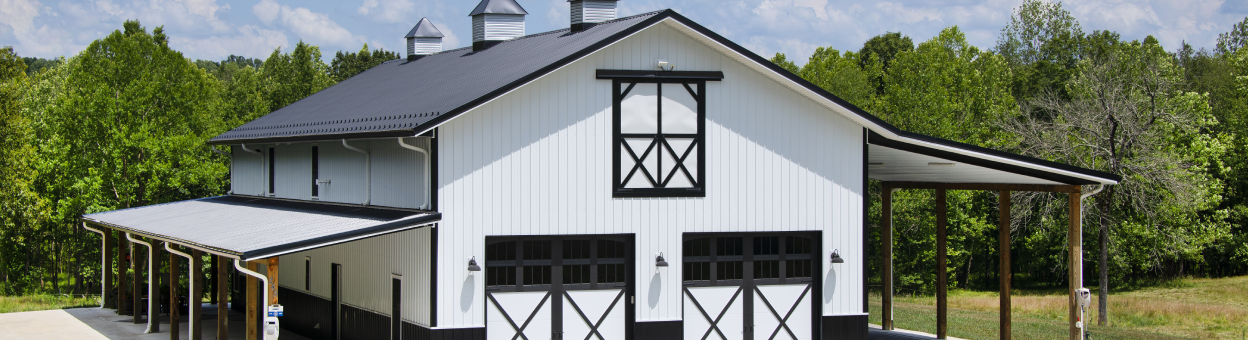
Through-fastened panels are generally attached with screws or nails, which puncture the overlapping roofing sections to lock the panels into place. They are also installed using washers, which provide leakage protection around the puncture hole. The fasteners are on the outside face of the panel and are visible even after the installation is complete.

So, how do your customers decide which option is right for their project? See below for some factors that can help them choose between a concealed- or through-fastened approach.

Key Considerations

Price/Budget:

Concealed: Typically, concealed-fastened panels can be more expensive overall due to the longer installation time required. In addition to increasing the labor cost, this installation method also takes longer, which affects your customer’s project schedule. However, ABC’s SL-16® panel can be installed faster and for about the same cost as exposed-fastened panel systems.

Through-fastened: While less expensive, through-fastened applications are more prone to issues. For example, if a washer fails, the screw can pop, which allows water in and can cause leaks and corrosion. While washer material is of a higher quality and more dependable than in the past, this is still a concern.

Durability:

Concealed: Because concealed fasteners have limited weather exposure, they therefore generally have a longer lifespan than panels with exposed fasteners. Additionally, there is less wear and tear since concealed panel fasteners are not as affected by the metal panel expansion and contraction that occurs when temperatures fluctuate as exposed-fastened panels are.

Through-fastened: Because concealed fasteners have limited weather exposure, they generally have a longer lifespan than panels with exposed fasteners. Additionally, there is less wear and tear since concealed panel fasteners are not as affected by the metal panel expansion and contraction that occurs when temperatures fluctuate as exposed-fastened panels are.

Aesthetics:

Concealed: Aesthetically, the main question is whether your customers want the screws to be visible or if it’s important that they are hidden. A concealed-fastened application is considered more aesthetically pleasing, as the lack of visible fasteners, creating a smooth, clean appearance. Generally, residential and architectural buildings favor concealed-fastened roofing panels.

Through-fastened: As stated, the hundreds of fasteners required to secure panels are exposed and visible on the outside of the panels. This method is often used on agricultural and industrial buildings, as clean aesthetics are usually less important for customers in these markets.

Ease of Installation:

Concealed: Installing concealed-fastened metal panel systems is time-consuming and complicated as compared to through-fastened. In fact, the complexity of the process dissuades many DIY installers from taking on the task.

Through-fastened: Exposed-fastened metal panel systems require less installation time as each fastener is drilled directly onto the outside of the panels. This makes it the method of choice for the majority of DIY installers. Overall, this method works well with simple structures but can be difficult to use on more complex projects. It should also be noted that through-fastened panels should be installed with care so that there is proper sealing. There also may be length limitations due to thermal movement.

Conclusion

The type of fastener system your customers choose for a given metal panel project will depend on a wide array of factors—budget, durability, aesthetics and ease of installation. Making the right choice is one step in ensuring the success and integrity of their building for years to come.

For more information on ABC’s concealed and through-fastened metal panels, visit our website. As always, our team is ready to help with your metal panel needs, so reach out to your local representative today!

Preparing for Installation of Your Metal Panels

There is no doubt that selecting metal roof and wall products is a wise investment. To make the most of that investment, it’s important to take certain preparation steps before beginning your metal panel installation. Once you’ve purchased the materials you need, the next order of business is to ensure the metal panels, trim and components are properly prepped. This is your best chance at keeping your job site safe, making sure your materials are not lost or damaged and ensuring your project stays on schedule so you reap the benefits of going metal.


  • Step One: Project Planning

    Starting your project with a clear plan will yield the best results. When planning your metal panel installation project, choosing an appropriate time to install is essential. Considerations will vary based on your location and include:

    • Moisture levels: it’s better to install when it’s dry (no rain, dew, snow or ice) as installing when surfaces are slick increases chances of slipping and injury.
    • Wind conditions: it’s better to install in low-wind conditions to prevent chances of injury/product damage.
  • Step Two: Material Check

    Once your materials are delivered to your warehouse or job site, the next order of business is to make sure you’ve received all of the building materials you ordered and that all pieces are in good condition. You will need to:

    • Manage a material receiving checklist
    • Check your panels for moisture, denting/bending, wind damage and additional transit abrasion
    • Ensure proper storage of your materials, including panels and trim in bundled and stacked sheets, to protect them from damage and prevent corrosion and/or galvanic reaction

    Check out ABC’s blog post on metal panel delivery and material handling for details on proper loading and unloading, cutting and job site safety. Additionally, our post on metal panel storage provides best practices on keeping your panels and components in pristine condition whether they’re going to be installed immediately or stored for future use or sale.

  • Step Three: Metal Panel Installation Preparation

    Once the location of the project is defined and the materials have been ordered, delivered and checked, the ultimate responsibility for on-site panel preparation lies with the installer, who should:

    • Re-check that all materials are present and in good condition
    • Arrange the material so that it stays undamaged and doesn’t pose a hazard to anyone on the site during installation
    • Ensure all metal panel installation tools are available and properly functioning, including drills, ladders and seamers
    • Make sure all safety preparations have been made and all safety gear is in good condition, including gloves, eye masks, safety helmets, boots and wrist guards.

Metal building panel and components manufacturers often make a variety of resources available for review, including product details, technical bulletins and installation manuals that can help building owners, distributors/contractors and installers alike. For more information on preparing for metal panel installation, contact your local ABC representative.

Preserve and Protect: Tips for Storing Metal Panels

The decision has been made to invest in metal roofing or siding for a project or business. Now it is incumbent upon job site professionals, business owners and/or contractors to ensure proper care is taken to preserve and protect the integrity and attractive appearance of your metal roof and wall panels from damage caused by moisture, corrosive chemicals or improper handling. To mitigate any potential issue, it is necessary to take a few simple precautions.


Material Receiving Checklist:

When the metal panels arrive, the first thing that should be done is to make sure the panels haven’t been damage while in transit. The metal panel manufacturer should have ensured that all materials were loaded and packed properly, so before anything is removed from the delivery truck, be sure to check that nothing looks damaged. If damage is found, the shipment carrier should be advised before they leave the delivery site and a notation should be made on the bill of lading. Every metal panel manufacturer will have specific instructions on how defects/damage should be notated and communicated to ensure proper and timely resolution of any issues. If there are no issues and everything looks good while on the truck, carefully unload the materials and check for the two most common issues: moisture and denting/bending:

  • Moisture: After unbundling, if there is moisture, the panels should be elevated, separated and dried in a secure are not exposed to wind or other elements.
  • Denting/Bending: If found, the carrier should be advised and the manufacturer should be made aware of the issue as quickly as possible. You should take inventory of the materials delivered as well as pictures of any damage a notation made on the bill of lading.
  • Additional Transit Abrasion: If found, the carrier should be advised and a notation made on the bill of lading. Take pictures of any damage as soon as you find it (don’t move the panels before taking pictures) and notify the manufacturer as soon as possible.

If you do have any issues with material, it is important to contact the material manufacturer or the place of purchase immediately to ensure the issue is addressed appropriately.

Protecting the Finish Before and During Installation:

On a jobsite, reasonable care should be taken when handling painted surfaces during unloading, unpacking, moving, handling and/or installation in order to protect the finish. Although the paint coating is tough and does provide impact resistance, dragging a panel across the surface of another panel will almost certainly mar the finish.

Storage Considerations:

Finally, when storing panels before sale, delivery to a buyer or jobsite, or while on the jobsite waiting for installation, you will want to take special care to store the panels in a proper manner to ensure the integrity of the material is protected. Here are some challenges, solutions and caveats for a number of common situations.

  • Prolonged Storage: This is NOT recommended when panels are bundled or in a damp environment. If conditions do not permit immediate erection, extra care must be taken to protect the material from damage caused by moisture. See the manufacturer’s installation manual for proper storage of materials as well as the section below for more details.
  • Bundled Sheets: Only store in a DRY place. Sheets should be unbanded and stood on end at a slight angle against an interior wall that is not exposed to wind in order to allow for good air circulation. If it is not possible to store sheets in an upright position, strapping bands should be broken and sheets should be blocked off the floor with one end slightly elevated.
  • Stacked Sheets: These should be completely protected from the elements while maintaining good airflow in order to prevent condensation.
  • Panel Coverings: A properly draped canvas tarpaulin that allows for adequate air flow is an example of a good protective cover. Do not use plastic as it causes sweating and condensation to occur.
  • Trim Storage: Do not store trim with strippable film in the sun for long periods of time as the ability to separate the film and its adhesive from the metal will become unmanageable.
  • Preventing Corrosion and Galvanic Reaction:
    • In order to prevent unwanted chemical reactions and corrosion, do not store the metal panels with materials made of dissimilar metals (lead, copper, etc.).
    • Strong acids (jet fuel exhaust, commercial cleaners/solvents, etc.) can degrade the finish and void the manufacturer’s warranty.

Conclusion:

Preserve and Protect—and also Inspect. Keeping these common-sense actions and precautions in mind, there is no reason that the unique aesthetic qualities of metal panels should ever be compromised on a jobsite. For more information on metal roof and wall panels and to learn more about how to protect them throughout their lifespan, contact your local ABC representative today.

Metal Panels for Tiny Homes: Part 2

California Tiny Home

COPYRIGHT DC PHOTOGRAPHY STUDIOS.


In the first article in our three-part series on tiny homes we presented an overview of the tiny home trend, including lifestyle considerations and cost benefits. In the second installment, we discussed how tiny homes are built with the same types of materials, construction and aesthetics you find in larger, traditional residences. Metal panels—a popular material choice for tiny homes—provide advantages such as affordability, mobility and customization. Some additional factors in choosing metal panels for tiny home construction are weather, installation and maintenance. Here we’ll take a look at these considerations in a bit more detail.

Weather Considerations:

While building tiny homes in mild climates can be pretty straightforward, there are many built in locations that must take specific weather conditions into consideration. Just as with traditional homes, tiny homes exposed to freezing temperatures need to be winterized to keep everything functioning, and can be heavily insulated, built with air-tight, double-paned windows and designed and oriented for optimum sun exposure to keep the heat in. For warmer climates and seasons, tiny homes designed to optimize air flow and fitted with adjustable shading to protect you from the sun’s heat can be an addition to more traditional temperature regulation methods, which should of course be properly installed and serviced.

When it comes to preparing for extreme weather, there are very few additional precautions to be taken in comparison with traditional single-family homes. One exception is that tiny homes should be built with hurricane ties and straps, earthquake tie-downs and other anchors to secure the structure. Building to codes specific to any area you would plan to take your tiny home is vital to ensuring it remains undamaged and you remain safe.

The Metal Panel Difference: Metal panels from American Building Components are designed and manufactured with several environmental considerations in mind. For areas prone to hurricanes and other tropical activity, ABC offers wind-tested metal panels built to withstand gusts of up to 140 miles per hour. This strength and durability is also important for those who plan to haul their tiny homes on highways at high speeds. If heavy snow and ice are common during your winters, the fast-shedding nature of metal panel makes them ideal. Eco-friendly insulated metal panels for roof and wall applications and cool metal roofs can also help regulate the temperature of your home and offer additional energy efficiency. Metal panels are also fire resistant (unlike thatched roofs, which are a fire hazard) and can withstand hailstorms and other extreme weather events. Your metal roofing manufacturer can provide advice based on your environmental needs.

Installation and Maintenance:

Understanding the maintenance requirements of any building material used to construct a tiny home is essential to maximizing the lifespan of the structure, safeguarding your investment and reducing any headaches that could arise from poor planning and inattention to the detail. It is, therefore, important that you fully understand the material you are using and that you follow the manufacturer’s installation and maintenance instructions, which should be made readily available to you. Also, be sure to read and understand any product warranties to ensure you know about any exclusions or requirements.

The Metal Panel Difference: One caveat with metal panels for tiny homes is the precision that installers (or DIY’ers) need to use in order to get the most value out of the material. While metal panels require a greater level of accuracy during the installation process, the benefits far outweigh the challenges. Resources on how to install and care for metal panels are abundant. In addition to referencing the manufacturer’s installation manuals, you can check out their how-to videos and lean on their customer service team for support and installer recommendations.

To extend the lifespan and strength of metal panels for tiny homes, maintenance consists mostly of preventing and correcting issues such as damage from the build-up of debris as well as storm-related traumas like hail stones, falling branches, etc. For specific maintenance tips, check out our recent blog on metal panel maintenance.

The last word

The benefits metal panels offer make their use for tiny home building a no-brainer. While homes made from other materials lose value over time, metal roofs provide long-term performance and environmental benefits, cost efficiencies and extended durability for the tiny home community. For more information on ABC’s metal panels, visit our website or contact a representative today.

Metal Panels for Tiny Homes: Part 1

In our previous blog post on tiny homes, we looked at the tiny home trend and outlined some of the pros, cons and lifestyle considerations for those interested in pursuing this increasingly popular, yet untraditional approach to housing. One of the obvious benefits is affordability, as the mere reduction of square footage lowers costs in terms of materials, labor, energy and maintenance, to name a few. Tiny homes are built with the same types of materials, construction and aesthetics you find in larger, traditional residences. Not surprisingly, metal panels are a popular material choice. Here we’ll look at the mobility and customization aspects of tiny homes and the additional advantages of choosing metal panels for tiny home construction.

Mobility

Tiny homes are typically built on trailer platforms with wheels (instead of a foundation), enabling them to be driven across the country. This mobility, however, demands that these homes are built to endure the hurricane-force winds of high-speed highway travel … no easy feat for any home.

The Metal Panel Difference: To ensure they can travel 65 mph on highways into 20 mph winds (the equivalent wind-load of a stationary house during a hurricane), many tiny home builders are turning to metal panels instead of more traditional building materials. Unlike with asphalt composition roofs, metal roofs do not need to be covered every time they’re moved as there is no concern over losing shingles while in transit.

Customization

Most homes purchased these days are significantly customizable and tiny homes are no exception. In addition to traditional customization like varying floor plans, paint color, floor material, fixture style, and interior and exterior decoration, there are also many eco-friendly customization options. Tiny homes can be built by recycling previously-used structures like shipping containers and transforming them into a living space, and can feature rainwater collection systems, composting toilets and solar array options for those looking to take their tiny homes “off the grid”. Tiny homes can also be made to be fully wheelchair accessible, as well as infant and toddler-friendly.

The Metal Panel Difference: A common misconception is that metal panels are only suitable for commercial applications. However, because they are available in a wide variety of styles, profiles and colors, metal roof and wall panels complement any residential structure, including tiny homes, making it easy to find the look that’s right for you. Beyond color choice and overall aesthetics, metal panels are manufactured and produced to provide a higher-quality building material option, giving you the aesthetic you want along with the durability you need.

The last word

The benefits metal panels offer make their use for tiny home building a no-brainer. While homes made from other materials lose value over time, metal roofs provide long-term performance and environmental benefits, cost efficiencies and extended durability for the tiny home community. For more information on ABC’s metal panels, visit our website or contact a representative today.

In the next installment of our Tiny Home series, where we go into further detail about the considerations and advantages of metal panels for tiny homes. Metal Panels for Tiny Homes: Part 2 will provide practical guidance on weather considerations, installation and maintenance.

A Simple Solution to Metal Panel Condensation

If you’ve ever gone outside before sunrise, you’ve likely noticed dew on the grass or on your car windows. This is condensation. While we may have learned the basics of this naturally occurring phenomenon in science class, we may need a quick refresher.

Condensation occurs when there’s more water vapor (the invisible, gaseous phase of water) than the air can hold. When the water vapor is cooled off or compressed to its saturation limit—at which point the vapor’s molecular density reaches its maximum threshold—it turns into liquid. Warm air can hold more moisture, but as it cools it reaches its saturation limit and water droplets form. While not a problem on the grass or your car (once you wipe the water away), condensation on metal panels CAN be a problem for your customers. The good news is there’s a simple solution.

ABC Drip Stop for metal panel condensation
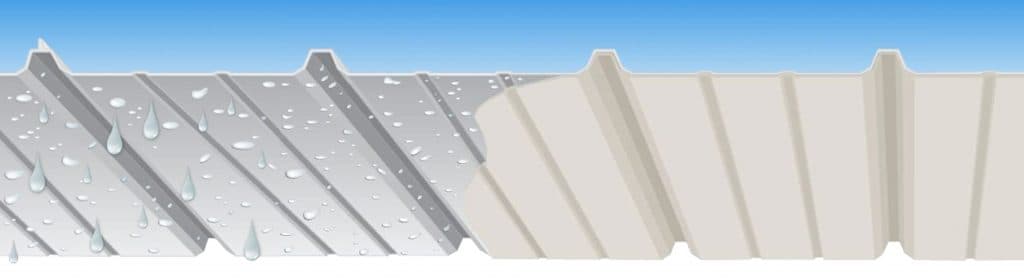
What causes condensation on metal panels?

When temperature and humidity conditions reach dew point, moisture can condense on the underside of metal roofing and potentially cause water damage to the inside of your customer’s building. Those drips from ceilings and surface moisture occur when warm air comes in contact with the cooler roofline or walls.

High interior humidity—a common cause of condensation in metal buildings—can result from heating and air conditioning systems, how the building is used, gas-fired heating components, improper construction techniques or even human respiration, as these all give off moisture vapor.

Effects of condensation on different types of panels:

If there is an abundance of condensation, water droplets will form and can cause damage. In metal buildings, there are a few possible consequences of trapped moisture in wall and roof systems:

  • Corrosion of metal components, even on surface-treated metal: When exposed to moisture, metal components can oxidize and weaken, decreasing the life of your customer’s building.
  • Degradation/ reduced effectiveness of the thermal performance of insulation
  • Mold or mildew growth, which can cause unpleasant odors and increase health risks, particularly for those with allergies or asthma
  • Insect infestations

Note: The probability of significant problems will depend on the location and usage of your customer’s building.

Controlling Condensation: What is the Solution?.

Traditionally, condensation is managed by insulating the metal roof so that the panel temperature never reaches the dew point. This is often accomplished using vinyl-backed fiberglass insulation to prevent humid air from coming into contact with the cooler metal roof (which may be at or below the dew point). If your customers are heating or cooling their building, adding insulation is certainly worth consideration. If they aren’t, there is another option to consider besides the installation of vinyl-backed insulation.

Your customers can consider installing Drip Stop, a patented condensation control membrane, to prevent damage from moisture. Drip Stop (manufactured by ABC) is a felt-like material with a rubber backer that can be applied to the back side of metal panels. The material literally traps and holds the moisture resulting from condensation. When conditions change, the ambient air temperature usually rises, thereby raising the dew point. The moisture is then released from the Drip Stop material back into the air in the form of normal humidity. Drip Stop can be applied to the back of metal coils (either Galvalume® Plus or painted) and then the metal can be roll-formed onto panels.

ABC Drip Stop for metal panel condensation

What are the benefits of this alternative condensation control method?

Drip Stop offers several advantages for your customers:

  • Durability: Drip Stop is a very tough, light gray anti-condensation felt that is not susceptible to ripping, tearing or deterioration unlike standard insulation and vapor barriers.
  • Low Maintenance: Drip Stop resists dirt and grime, is antimicrobial and is very easy to clean with a hose or pressure washer.
  • Corrosion Protection: The rubber backer on the material helps protect the back side of the panel from corrosion (although there is no protection at the panel’s cut edges).
  • Easy to Handle: There is no need to roll a vapor barrier over purlins and then seal with tape, which can reduce labor hours and cost. Additionally, the use of Drip Stop is not hindered by windy conditions.
  • Safety and Insurance: The material is approved for smoke generation and flame spread per UL® 723 for insurance specifications.
  • Acoustic Benefits: Drip Stop helps dampen sound from either inside or outside the building.
  • Versatility: Drip Stop is approved for use in residences, warehouses, industrial plants, sports arenas, schools, storage buildings, garages, animal confinement facilities and more.
  • Cost-Savings: Drip Stop is up to 25 percent less expensive as compared to traditional solutions.
  • Warranty-Backed: Drip Stop features a 20-year adhesion warranty to ensure longevity.

The Bottom Line:

There’s no need for the damaging effects of condensation to put a damper on your customer’s metal building project. With a simple solution like Drip Stop, you customers can protect their assets and prevent costly and time-consuming repairs.

For more information on Drip Stop and how it can be applied to ABC’s PBR, Imperial Rib® and Retro-R® panels, visit our website or contact your local sales representative.

Safety and Savings Courtesy of Metal Panels

Most people understand that buildings outfitted with secure, storm-resistant roofing material like metal are less prone to damage from hurricanes, hail storms and other damaging weather events. Not only does this strength provide safety and security for the building owner, but those qualities also translate into cost-savings outside of what’s saved due the longer lifespan and lower maintenance requirements of metal panels.

Metal Panels deliver strength and savings

Safety in Strength

Metal roofs are made to last. Thick panels, properly installed and maintained, have a lifespan of up to 50 years under normal circumstances—double that of most asphalt shingle roofs. To ensure that lifespan, metal roofing manufacturers perform rigorous tests (according to strict ASTM standards) that document performance under a range of environmental traumas. These tests confirm that, compared to other surfaces, metal offers superior performance when subjected to the following:

Hail

Even the most basic metal roof is a shield against hail damage, but of course some products and roof designs offer even greater protection. To protect against hail damage, the optimal option is a heavy-gauge metal panel roof installed over solid plywood or oriented strand board (OSB) sheathing. Two of the most comprehensive post-storm studies found that such roofs survived even the biggest hailstones without punctures or leakage.[i] In the worst cases, the damage to the metal was only cosmetic.

Wind and water

Metal roofs can withstand wind gusts as strong as 140 mph. Because they consist of large interlocking panels, they’re less susceptible to uplift than individual asphalt shingles and offer fewer entry points for water.

In addition, the synthetic underlayments used by professional roofers are 20 times stronger than felt, so in the unlikely event that the roof is punctured there is a much lower chance that water will get into the structure. (Synthetic underlayments also stay as much as 25 degrees cooler on a hot, sunny day and include an anti-skid coating that keeps roofers safer during installation.)

Wildfire

We’ve all seen pictures of metal-roofed homes that have survived wildfires while the surrounding structures burned to the ground.[ii] It makes sense: metal panels hold a Class A fire-resistant rating (the highest possible), making a metal roof installed over a fire-resistant cap sheet the optimal combination in fire-prone areas. In fact, a publication from the UCLA School of Architecture urges homeowners rebuilding in wildfire zones to use non-combustible roofing and siding. It also cautions against the use of clay tiles, which can develop cracks that allow wind to drive burning embers into the attic.[iii]

Lightning

Many people ask about metal roofing’s lightning resistance: does its conductivity make it more susceptible to strikes? The answer is no: not only is a home with a metal roof no more prone to this than any other structure, but if it is struck by lightning the large metal surface will do a good job of safely dispersing that energy.[iv] And because metal is not flammable, a strike is much less likely to start a fire, which is often the most devastating result of a lightning strike.

Continual Savings

Confirmation of metal’s durability and safety comes from a third party business with a real stake in the matter: the insurance industry. Some insurance companies offer lower premiums for the use of qualifying wind- and impact-resistant roofing materials like metal. These include large national insurers like State Farm and Nationwide, which offer discounts in 26 states plus one Canadian province for certain roofing products with Class 4 wind ratings. Most metal roofing manufacturers, including American Building Components, have several products on their lists.

For more information on ABC’s roof products, please visit our website or contact your local representative today.


[i] http://www.constructionmagnet.com/metal-roofing-magazine/metal-vs-mother-nature-hail

[ii] http://photoblog.nbcnews.com/_news/2012/08/16/13314843-lone-house-surrounded-by-scorched-earth-survives-wildfire?lite

[iii] http://www.energy-design-tools.aud.ucla.edu/FIRES.html

[iv] http://www.metalroofing.com/v2/content/guide/newsletters/04-0701.cfm

How Metal Trim Earns its Keep

Selecting the right trim and installing it correctly is crucial to ensuring metal buildings look good and stay dry.

The success of any metal panel roof depends heavily on the trim. Aside from providing an elegant, finished look, these hard-working components serve as part of the flashing system by sealing joints, side seams and end laps against leaks. The right trim installed in the right manner will help keep metal buildings dry and good-looking for years to come.

Where is trim used?

When most people think of trim, the pieces that come to mind are those installed around a roof’s perimeter: the ridge, or peak; the eaves, or lower edges; and the rake, or side edges. But just as important are those less noticeable pieces installed wherever there’s a change in roof slope, as in a valley, or where the roof meets a vertical surface like a dormer wall. Valley and dormer trim play particularly tough, yet vital roles because they have to prevent water trapped by leaves or snow from backing up into the structure. This is just as important on metal walls where trim sheds water away from windows and doors, and waterproofs inside and outside corners.

Trim performance and aesthetic

In addition to performing well, the trim also has to be attractive, and trim thickness can be a major factor in how good the roof looks. Although the trim pieces are usually the same thickness as the panels, as we mentioned in our post on Metal Panel Gauges, it can be helpful to step up to something thicker, which is less likely to telegraph imperfections in the underlying roof or to dent if the installer mistakenly over-drives a screw. Additionally, a heavier-gauge trim can help prevent “Oil-canning”—the deformation of sheet metal—which can be common on trims applied to corners and door jambs. Using A 26-gauge trim piece on a 29-gauge roof may even allow for the selection of thinner roof panels, adding to homeowner satisfaction without adding much to—and maybe even reducing—the cost.

Installation factors make a difference

Trim can only succeed at its job when installed in the proper sequence. On a roof, the eave and valley flashings must be put in place before the panels, while the rake and ridge pieces wrap around the tops of the panel edges. Done right, this sequencing creates overlaps that naturally shed water. The proper overlaps also protect the roof against wind-driven rain by ensuring that any water that sneaks past the trim during a storm hits an underlying piece of metal and drains back out to daylight so it can be evaporated. As an added layer of redundancy, the installer will include a sealant tape between the trim pieces and the panels. These serve as gasketing to keep water on the outside. Additionally, trims that are hemmed at the edges can add rigidity to and fight corrosion of the factory cut edge.

Even the highest quality materials will not perform optimally unless installed correctly. To ensure each piece of trim is perfectly straight and square from end to end, with no bumps or dips, the installer will usually have someone on the ground confirm that everything looks right before fastening each piece.

For information on ABC’s trim, including diagrams and installation manuals, visit our website or contact a local sales representative today.

Maintaining, Cleaning & Repairing Metal Panels

Understanding the maintenance requirements of your metal panels is essential to maximizing the longevity of your investment with the least amount of hassle. While metal panels have been engineered to provide decades of trouble-free protection, they can suffer damage from the build-up of debris as well as storm-related traumas like hail stones, falling branches and ice dams. To extend the lifespan and strength of metal panels, maintenance consists mostly of preventing and correcting these issues.

metal roofing maintenance tips

 The importance of regular inspections

Regular inspections are critical to identifying damaged panels and accumulated debris that can trap moisture, causing corrosion over time. To prevent this, a visual inspection should be performed in the spring and the fall of each year, as well as after major weather events to identify issues. Take a walk around the structure and look for leaves, branches and other debris piled up on the roof, including in valleys, gutters and downspouts, as well as behind chimneys and/or other protrusions. While you can perform this type of inspection yourself, please keep in mind that metal panels—particularly metal roofs—should be professionally inspected every four to five years depending on your geographic location. If you live in a coastal or humid area more prone to corrosion and rust, professional inspections should be done more frequently to prevent the rust from spreading and causing structural damage to the panels.

In addition to debris, keep an eye out for scratched or dented areas, as well as for loose screws and seams that look like they are separating. (If you can’t make out the details from the ground, try using a pair of binoculars.). Use the manufacturer’s recommended touch-up paint to correct scratches as they can quickly degrade the surface protection and jeopardize the longevity of metal panels. If the panels have separating seams or holes, first check to see if the repair is partly or fully covered by your warranty. Unless you are experienced in metal roof repair and possess a thorough knowledge of the products and techniques that can be used without voiding the warranty, it is recommended that you engage a metal panel repair specialist to make the repairs. If you decide to undertake the work yourself, it is also important to remember that these fixes are, at best, temporary and should be addressed by a professional recommended by the metal panel manufacturer.

Cleaning metal panels

Keeping metal panels clean is one of the best ways to ensure they last as long as possible. When cleaning metal roofs and walls, using a non-pressure cleaning method with detergents recommended by the metal panel manufacturer is ideal. It is not advisable to use metal tools such as rakes to remove debris. This is likely to scratch the paint, reducing the panels protection from the elements and other damaging factors. Using a leaf blower to remove debris is a common choice, but a long-handled push-broom or a telescoping pole with a window cleaning brush will also do the job. Ideally, the tool should be one that lets you do the removal from the ground, but if you absolutely must walk on the roof then only step on the flat areas. If there are areas you can’t access yourself—particularly slanted areas that have been made slippery with cleaning solutions—hiring a professional service to do this once or twice a year is the safest option.

To reduce the chance of further damage and keep your panels cleaner over longer periods of time, trim tree branches as far back from the building as possible. This is especially important for large, unhealthy branches that could break off during high winds and cause damage.

Proper snow removal

There are—of course—considerations that must be made for metal buildings located in colder climates. After a winter storm, it’s a good idea to remove standing snow from the roof. This is doubly important on older homes where poor attic insulation can lead to ice dams. An ice dam forms when heat escaping from inside the attic warms the roof and melts the bottom layer of snow. The snowmelt then re-freezes, creating a dam that traps water which can work its way into seams between panels and around flashings.

Warranty considerations

It’s always smart to reference the metal panel manufacturer’s warranty to be sure you don’t use any products or tools that will void your warranty. They should also provide instructions and advice specific to the panels and application(s) you’ve selected to ensure you get the most out of their products with the least hassle.

For more information on metal panels, check out ABC’s FAQ page. For more on our metal panels and accessories, please visit our product pages or contact your local representative today.

Metal Roofing Gauges: What Are The Best Gauges For Metal Roofs?

When your customers decide to use metal panels for their building project, they’ll need to make several decisions to choose the best panel. One of the first decisions they’ll make is what gauge or thickness they need. There are a variety of metal roof and wall panel profiles to choose from, and they are all available in several gauge thicknesses … but what does that really mean to your customers and how does that affect your business?

Metal Panel Gauges: Are you getting what you pay for?

Metal Panel Gauges Deciphered

U.S. manufacturers express the thickness of metal panels as their ‘gauge’, with 22-gauge being the thickest and 29-gauge the thinnest of traditionally-sold metal roof and wall panels. Each gauge represents a nominal decimal range. For example, a 26-gauge steel panel can range between 0.0179 and 0.0217 inches thick according to a University of North Carolina at Chapel Hill resource.

This means that while a 26-gauge panel from one manufacturer could measure 0.027 in. thick, a 26-gauge panel from another manufacturer could measure only 0.0179 in., but both are sold as 26-gauge panels. Although those seem like small numbers, they represent a noticeable difference in panel stiffness and strength.

So how do you and your customers know if the metal panel manufacturer has used thinner sheeting and made up the difference with a coat of paint? When ordering inventory, you should look beyond the gauge number to the manufacturer’s specifications on metal thickness. This will give you peace of mind that you’re providing your customers with the gauge they’re paying for and the quality they need to get the job done.


Costs of 26-Gauge Panels vs. 29-Gauge Panels

Expect to pay more for thicker panels. The cost of a 26-gauge product will be about 15 percent higher than a 29-gauge with the same profile from the same manufacturer. While some people insist that the extra cost is always worth it, that may be misleading. Yes, thicker panels are stronger, but the importance of that added strength depends on the type of building construction as well as the customer’s priorities and location.


When To Choose a Thicker Metal Roofing Gauge

There are instances where thicker gauges always earn their keep. The most common of these is the post-frame building, or pole barn: an open-framed structure used for barns, garages and warehouses. Post-frames generally lack structural sheathing, so the roof and wall panels must span between the supporting trusses or purlins. Because 22-, 24- or 26-gauge sheeting is thicker, and will, therefore, remain more structurally sound over a longer span than a 29-gauge, the building needs fewer supports, which saves your customers money. For post-frame structures like this, it is important for your customers to consider the potential snow load the roof may need to support when choosing the metal panel gauge. Lighter-gauge (thicker) panels may save your customers from structural collapse in the winter months!

Lighter gauge (thicker) metal is also more forgiving of installation errors such as the over-tightening of screws, and it won’t be as likely to transfer bumps and waves in the sheathing. (The latter is more likely when re-paneling an older home.) Thicker trim pieces will also lay more accurately, so some homeowners and contractors opt for 29-gauge roof and wall panels with 26-gauge trim, a combination that is common and cost-effective.


When To Choose a Thinner Metal Roofing Gauge

Span isn’t always a concern in the residential market. Nearly all homes have a layer of plywood or oriented strand board sheathing covered by a weather-resistant barrier. The metal panels are affixed to the sheathing and serve no structural role in these instances; their job is to keep the sheathing dry. A quality 29-gauge panel is more than adequate for this—which is why it’s used on nearly 80 percent of homes with metal panels.

Despite this, thicker (lighter-gauge) panels can make sense for buildings in hail-prone areas, but not because of structural integrity. A 29-gauge metal panel can have the same impact-resistance rating from Underwriters’ Laboratory (UL) as a 26-gauge panel; the advantage of thicker metal panels in this case is that they are less prone to denting. If your customer lives in a place like Cheyenne, Wyoming (the hail capital of North America) and is concerned about long-term appearance, thicker panels may be the better option.


Let ABC Help You Choose the Right Metal Panel Gauge!

For more information about metal panel gauges, check out our panel selection chart or contact your local ABC representative today. Additionally, use our online ordering tool to find accurate pricing, create quotes and place orders for metal building products anytime, anywhere and from any device.  If you don’t already have an account, register for access today!

DISTRIBUTORS: Shop online at shop.abcmetalroofing.com!