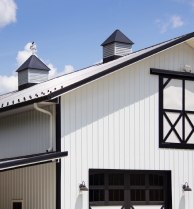
HOW TO INSTALL A METAL ROOF RIDGE CAP
Our metal roofing installation expert walks you through the installation of a ridge cap on a metal roof. Watch the instructional video above or read through the steps below to help educate your customers on how they can effortlessly install a ridge cap on their metal roof.
Before you get started on the installation process, be sure you have all the tools necessary:
- Drill & Drill Bits
- Tape measure
- Chalk line
- Circular saw
- Pencil or sharpie
- Metal Snips
- Pop Rivet Gun
Ridge Cap Installation Overview
Once you’ve installed your metal roofing panels on both sides of the roof, you will need to close off the ridgelines. We will walk you through the steps for installing both ventilated ridge caps and closed ridge caps using our SL-16 concealed fastener metal roofing system.
Closed Ridge Cap Installation
Installation of a closed ridge cap is fairly straightforward. You will need to make sure you prep the Z-trim underneath before you install the ridge cap. Follow the instructions below:
- Cut the Z-trim to fit between the metal panel major ribs.
- Use your ridge cap to mark the ribs so that you know where to place the Z-trims. The Z trim will set on the outer edge of ridge cap coverage
- Make sure the Z-trim has tape sealant on both sides , between the trim and the panels. You’ll also need to have tape sealant between the ridge cap and the top of the Z. Fasten the Z-Trim with wood fasteners, and the bottom leg pointing towards the roof peak.
- Once the Z-trim has been fastened to the roof panel, you position your ridge cap and fasten it to the Z-trim using POP rivets or lap-tek screws
- If you want to finish the ridge cap at the gable, let it overhang by about an inch, make your marks, and bend it down. The result is a nice clean look, and it will ensure that water doesn’t get in between the top of the gable trim and the underside of the ridge cap.
Ventilated Ridge Cap Installation Overview
Next, we’re going to start working on the vented ridge in this application for SL-16. There are a few things to consider before you’re able to install your ventilated ridge cap.
Soffit Venting vs Gable Venting
Since every building and house is different, it’s important to evaluate a building based on the construction, what’s taking place inside the roof cavity and what kind of insulation is used.
Generally, there’s a lot of confusion about venting soffit and ridge versus gable venting. So one important note is to make sure that you’re using either a ridge vent in combination with open soffits or you’re using gable venting, but that you’re not combining the two. If you combine the two, cross airflow cancels each other out and you end up with a much less effective venting of your roof cavity.
Venting A Soffit
In this particular installation, we have open soffits, so we’re going to open the ridgeline so that we can install our panel and the profile vent material.
- To vent your soffit, start by making an opening 2” on either side of the ridge. Mark 2” from each side of the ridge.
- Snap a chalk line to mark your cut line that is 2” from the center of the ridge.
- Before you start cutting, set the depth of your blade so that you’re only cutting through the decking of the wood. In our example, we have ¾” plywood, so we set the depth of the blade to give or take an inch or 3/4 of an inch. This ensures that you don’t cut through trusses.
- Use a circular saw cut along the chalk line to create an opening.
- As you get to a gable, you want to stop 1 or 2 feet short with your cuts.
Installing A Vented Ridge Cap
You are ready to install the vented ridge cap. Since you’ve made a cut 2” on either side of the centerline of the ridge, you now have to install a ridge cap with the vented ridge material.
In our example, we used ABC vented ridge material that’s been die-cut to fit the SL-16 panel. To install it, use an anchor clip system and tape seal on the underside.
The first thing that you want to do is make a mark so that you know where to position the profile vent. Then, put the ridge cap in place, mark the tops of the ribs and line it up with the ridgeline. Using a pencil, make a mark on top of the panel ribs. When you remove the caps, the marks let you know where you need to like up the profile vent.
Installing the Clips & Profile Vent
The profile vent system consists of the vented material and the clips. The first thing that we must do is install two clips per SL-16 panel and then thread the profile vent through the clips. Each roofing panel will have two anchor clips fastened to it.
- Using the mark on the rib indicating where the ridge cap ends, set the anchor clip back 1” behind that line. Setting the clips back ensures that the profile vent is not visible when looking up at the ridgeline.
- Once you have your anchor clip in the right position, screw in through the pilot hole at the top of the clip.
- Once you have both clips screwed to the metal panel, lift the clip and you can thread the profile vent through.
- Screw down the back of each of the anchor clips to hold them down.
Once that’s done, we have the installation of two clips with a profile vent held securely in place.
Fastening The Ridge Cap To The Clips
Now that you’ve installed the profile vent, the next thing to do is put the ridge cap in place and fasten it to each of these clips.
- Position the ridge cap, making sure that it’s aligned with the center of the ridge.
- Now that the ridge cap is in place, fasten it to the clips using stitch screws or pop rivets.
Once you’ve fastened the ridge cap to all the clips, you will have completed your metal roof ridge cap installation.
We’re happy to answer any of your questions regarding this how-to or any other question about metal roof installations. Contact our installation experts to get more tips or answer your metal roofing installation questions!