To ensure you and your customers have the resources needed to get the job done, we’ve created installation videos that show your customers how to seamlessly integrate hip panels with our high-quality metal roof panels.
Learn more about the installation of hip panels by watching the short video or reading the transcript below:
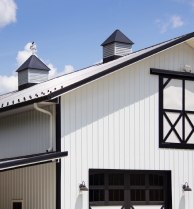
A hip cap is used a lot like a ridge at a slope. One thing to keep in mind is that often you’ll use the exact same part on a ridge as you’ll use on a hip. The difference to keep in mind is pitch. This is a 6/12 pitch roof, but a hip cap for a 6/12 is not going to be as tight as a ridge cap for a 6/12, so you wouldn’t want to use your hip trim on the ridge cap. Otherwise, when you start putting all the screws in, it’s going to pull and fight, creating some waves all the way down.
Measuring the Panel
Now we want to get into how to cut these panels and make sure that they’re right every time. Every hip and valley panel has a long side and a short side. Today we’re going to teach people how to easily take those measurements with a 2-foot square. Most people automatically assume that they’re going to be calculating their hip or their valley off of the 16 inches of coverage, but the true width of the panel from outside edge to outside edge is 17 ½ inches. Let’s put this panel up here and we’ll take a look.
If we measure this panel from outside edge to outside edge, you can see that it’s 17 ½ inches and that’s the measurement we need to use because when we’re calculating our angles, we’re going from the outside to the hip, which is on the other outside of the panel. One tip is to mark square at the panel width outside the major ribs.
Lining the square up with the inside of the last panel, we’re going to slide this up until our 17 ½ inches mark hits the hip and we can see that right there is where we’ve hit. We can transfer that measurement over to the panel by making a mark here, which gives us the short length of the panel and we already know our length. In this case, we have a panel that we’re going to come across about 6 inches and then start our angle, so we’ll measure for that and transfer the short measurement to the panel.
What I’m going to do now is take the long measurement, measuring from the top of the panel down to the eave. That’s 41 1/8 inches. The next measurement, which is the short on the angle, from the line that we just made is 29 3/8 inches, and the distance from the top to the hip is 7 ¼ inches. Next, take those three measurements, transfer them to the back of a panel and cut the panel.
Transfer the Measurements
Now we’re going to transfer those measurements to the back side of this panel, join our lines and make our cuts. I want to point out something really important; at the eave of this panel, there’s a 1 inch clip that clips onto the drip edge. This panel’s already been prepared with the clip, but if you don’t prepare it first, you have to account for the 1 inch and add one inch to all of your measurements. In this case, we don’t have to because it’s already been finished.
Our long measurement is 41 1/8 inches and that’s what this panel already is. We know that we have to come over 7 ¼ inches and make a mark before we hit the hip so let’s do that. That 7 ¼ inches mark was from the inside of the rim. So I’m going to come over and make a mark at 7 ¼ inches. The next measurement to mark is the short side at 29 3/8 inches. Now we know what we have to join. Using a straightedge, I’m going to join these two marks and cut the panel along this line. If you look at the panel, you can see that we have our 7 ¼ inches at the top. Here we hit the hip and this is our angle from long to short.
Now it’s time to put the panel on. It snaps into place and you can see that our angle runs up along the hip when we come across the top. When you’re installing a hip panel, if you’re a little bit off your line, don’t worry about it, your hip cap’s going to come and cover that panel, no problem. We’ll install this and move on to the next panel, which will be entirely long and short.
Prepare the Bottom for Clipping
The last panel that we installed already had the bottom prepared for clipping over the drip edge. With this panel, we’re going to leave the end unfinished so that we can show people how to take their measurements and account for the 1 inch clip.
Again, we have the 17 ½ inch mark on the square and we’ll calculate for the short. We put it on the inside of the last panel, body up against the rib and move up until we hit our line and then transfer this line over to the panel, and I’m going to make a mark right here. This marks the distance to the eave and gives us our short side. Our long side is from up here down to the eave.
For the hem, we’re going to account for 1 inch. We’ll add 1 inch to each of these measurements, starting with the short side. We know that the
short side is 10 7/8 inches, and our long side is 30 7/8 inches. To recap, we have a short measurement of 10 7/8 inches, and we have a long measurement of 30 7/8 inches. Take these measurements, transfer them to the panel, and account for the 1 inch clip. To make sure that I get the bottom side and the top side correct, I’m going to make B for the bottom, T for the top, in this way I know not to make any mistakes because we’re working backwards.
I’m going to take the long measurement, which is 30 7/8 inches, and I’m going to add 1 inch to it to account for the clip, then I’m going to make a mark on the panel at 31 7/8 inches. The short measurement was 10 7/8 inches, so we’ll make a mark at 11 7/8 inches. There we go. I’m going to extend these lines on the panel and connect them so that we can do our cuts.
This is where you want to use your square to make sure that you’re lining up with the factory edge of the panel. Using my square, I’m marking this line so that I know where to connect them. We’ll do the same thing for the long side. Now all that’s left to do is connect the long to the short and make our cuts. Using a straightedge, we’re going to connect these two lines, and remember, you’re going from the outside edge to the outside edge. It’s important that I line up right here, and I connect these two and draw my line.
Finish Installation
Now we have the finished panel on the hip where we took our short measurement, joined it with our long and we finished the eave. We made sure that we added 1 inch to our measurements to account for the clip and now we’ll install it. Clip it in, knock it up and we can see that we’re running with the same angle as our hip. Like I said, it doesn’t matter if you’re a little bit off your hip line, your hip cap’s going to come and cover that and it’s not a problem.
As you can see we’re on our last panel on the hip, and this is going to be a very small panel. We have to calculate our long, and we have to take the width to our zero point. By measuring from the top of this to the bottom, we can see that it’s 12 inches. If we measure over from the inside right to there, we can see it’s about 10 ¾ inches. If we go from this measurement, out 10 ¾ inches and join those two lines, that’ll be our final panel for this hip.